DaVinci Resolve is where a lot of colour and finishing happens — including on the free edition. Captioning is where editions diverge: Resolve Studio can run neural speech-to-text; free Resolve expects you to bring captions in as a timed file.
This guide shows a Mac-native workflow: generate and proof captions offline with Subtitle Studio, export an SRT, import it onto a Resolve subtitle track, then soft-deliver or burn in on Deliver. For a shorter product page, see Add subtitles in DaVinci Resolve.
Why free Resolve users generate captions outside the app
Studio’s built-in transcription is convenient if you already pay for Studio. On free Resolve you either type every line by hand or import a sidecar. Manual entry falls apart past a trailer. Generating captions on your Mac also keeps unfinished grades off cloud caption services — the same offline / no-upload reason editors use for legal and NDA work.
Method overview
- Picture-lock (or export a matching reference movie).
- Auto-generate subtitles offline in Subtitle Studio.
- Proof cues in the Mac subtitle editor.
- Export SRT.
- Import onto a Subtitle track in Resolve (not Text+).
- Style in the subtitle inspector; Deliver soft subs or burn-in.
Step 1: Generate subtitles offline on your Mac
Import your locked cut (or a reference export) into Subtitle Studio and run Generate Subtitles. Whisper-class models run on-device after a one-time model download — media is not uploaded for transcription.
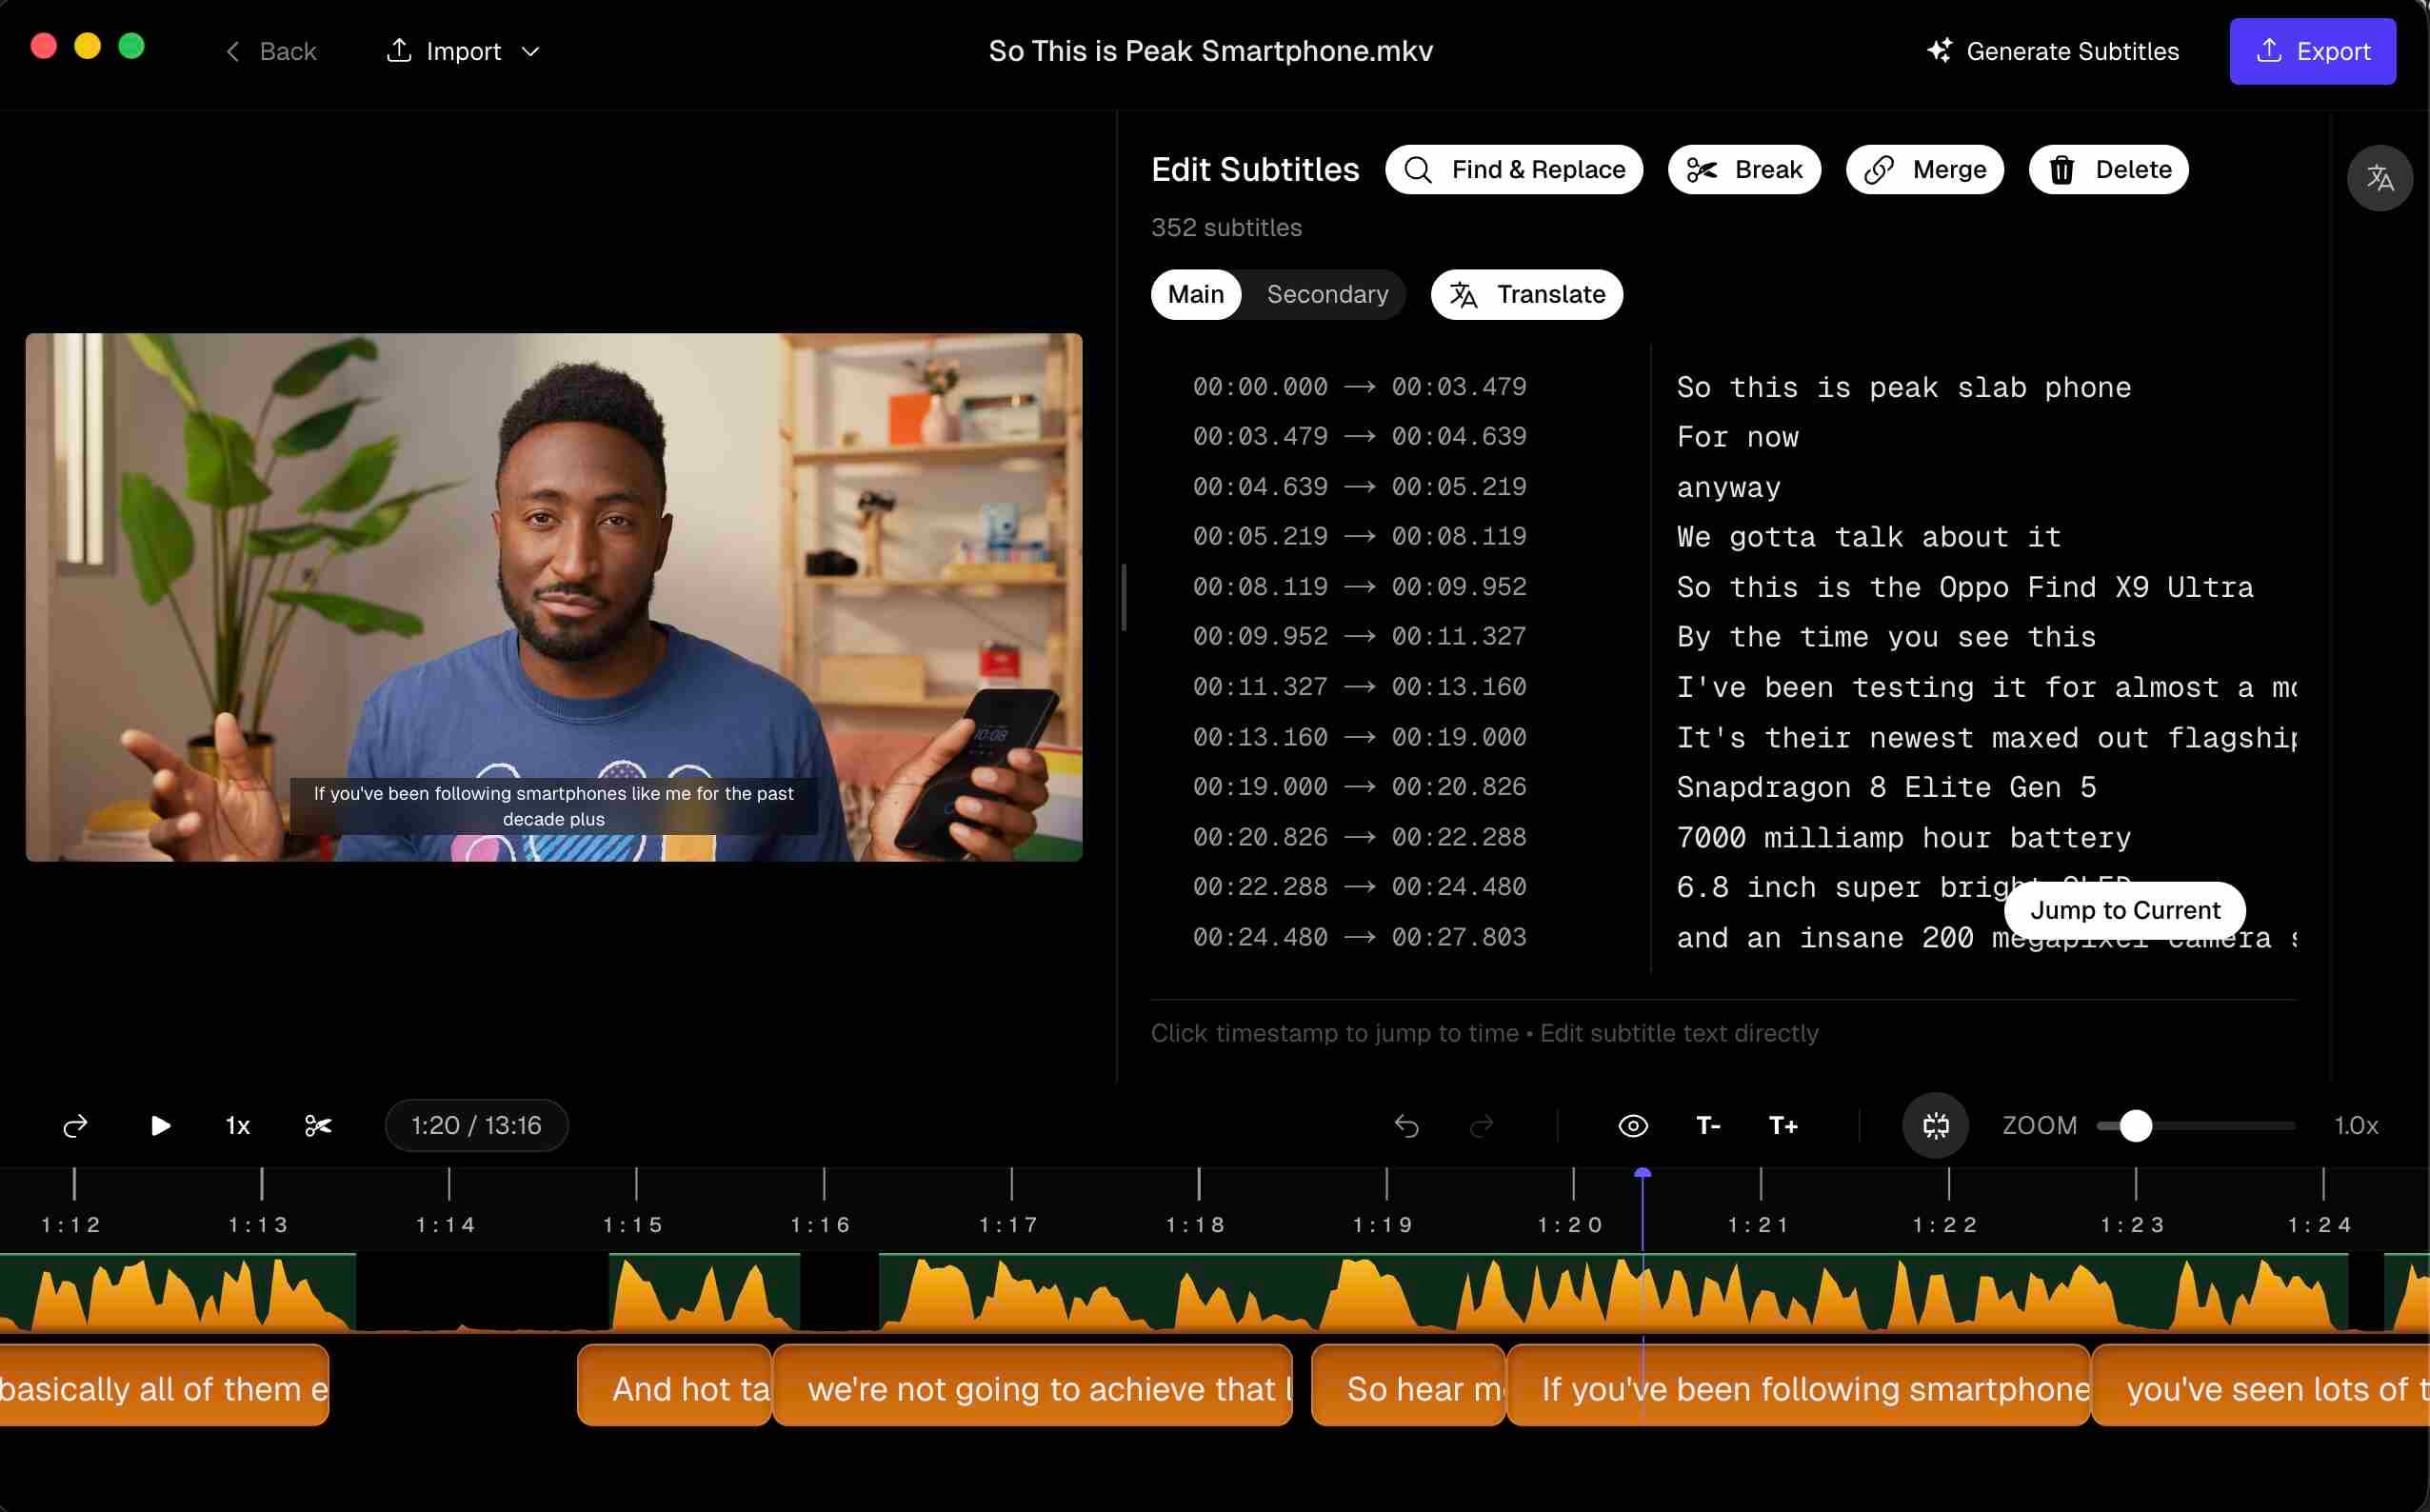 Subtitle Studio showing completed subtitle generation with cues ready for review
Prefer Apple Silicon (M1+) on Mac — Subtitle Studio also runs on Windows 10/11 if your Resolve suite lives on a PC. Models download once; after that you can caption with the network off.
Step 2: Edit in the dedicated subtitle editor
Review each line before it hits Resolve. Fix names, split long cues, and drag timings against the waveform. It is faster to clean a cue list here than to chase hundreds of subtitle clips on the Resolve timeline.
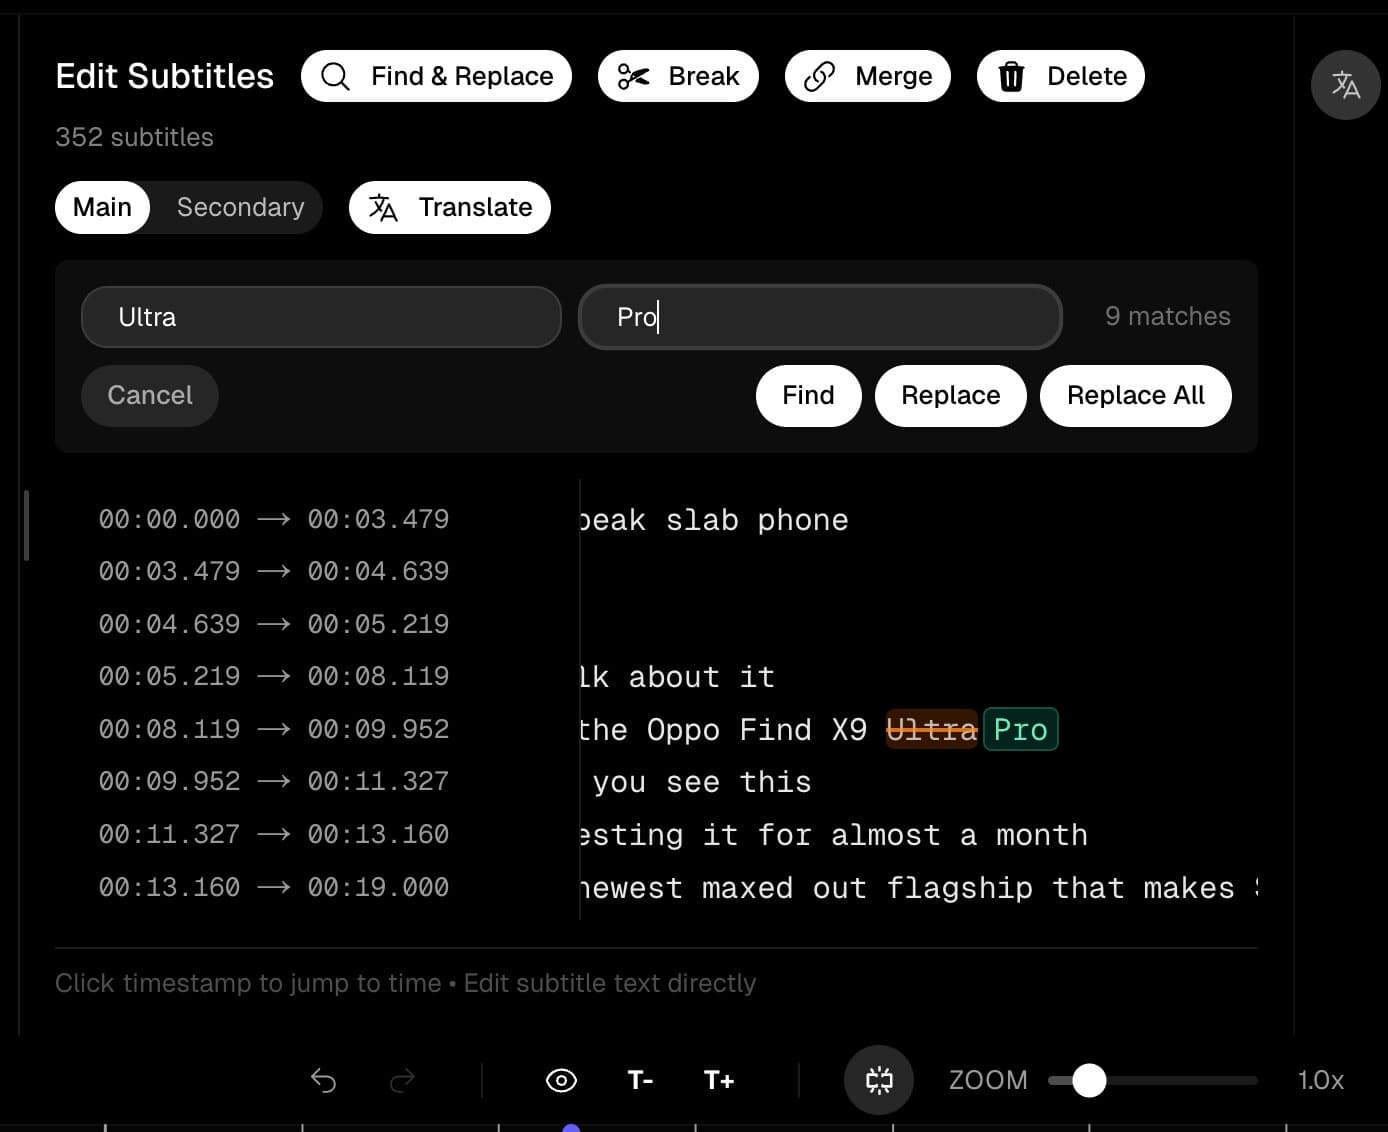 Subtitle Studio editor showing individual subtitle lines with editing controls
Optional: translate on-device or enable dual-language layouts if your deliverable needs them.
Step 3: Export SRT
Export an SRT from Subtitle Studio. Keep the same cut and frame rate you will finish in Resolve — captions generated against an older edit will drift.
Transcription and editing are free to try; SRT export unlocks with the Lifetime License.
Step 4: Add a Subtitle track in DaVinci Resolve
Open your project on the Edit page. Add a Subtitle track to the timeline. Dialogue captions belong here — not in Text+ or Fusion text, which are for designed titles and lower thirds.
Step 5: Import the SRT
Import the SRT onto the subtitle track (File → Import → Subtitle, or drag, depending on your Resolve version). Spot-check sync on hard cuts and music hits.
Timed subtitle cues ready to export as SRT for DaVinci Resolve
If cues land early or late across the whole show, re-export from the current picture lock rather than sliding every line by hand.
Step 6: Style in the subtitle inspector
Select subtitle clips and set font, size, colour, and position in the subtitle inspector. Keep roughly two lines per cue and stay inside title-safe for broadcast deliveries. Heavy motion treatments belong in Fusion — usually overkill for dialogue.
Step 7: Soft subs or burn-in on Deliver
On the Deliver page:
- Soft subtitles — include a sidecar where the platform accepts SRT (YouTube, many web players).
- Burn-in — enable burn-in in Resolve when the destination ignores sidecars, or burn in upstream in Subtitle Studio for social cutdowns and bring a flattened MP4 into Resolve.
Render a short test before overnight exports so font size and safe areas survive the encode.
Subtitle track vs Text+ vs Fusion
| Tool | Use for |
|---|---|
| Subtitle track | Dialogue captions, SRT import, soft subs, Deliver burn-in |
| Text+ | Openers, designed titles — not hundreds of interview cues |
| Fusion text | Motion-graphics control for a single title |
If you are pasting cue text into Text+, switch to a subtitle track.
Tips for clean Resolve captions
- Match the cut — regenerate or re-time after picture lock changes
- Reading speed — cues under ~1 second are hard to read; aim for at least 1.5 seconds when speech allows
- CJK coverage — pick a font with the glyphs you need in the inspector
- Free vs Studio — free Resolve does not include Studio neural STT; SRT import is the reliable path
Conclusion
Free DaVinci Resolve is fully capable of professional captions once you bring a timed SRT. Generate and proof offline on your Mac with Subtitle Studio, import onto a subtitle track, then finish look and delivery inside Resolve — without retyping every line or uploading unfinished media to a browser tool.
Subtitle Studio
One-time purchase. Runs fully offline on Mac and Windows.
Try Subtitle Studio for free
One-time purchase. No subscription. Runs fully offline on Mac and Windows.
