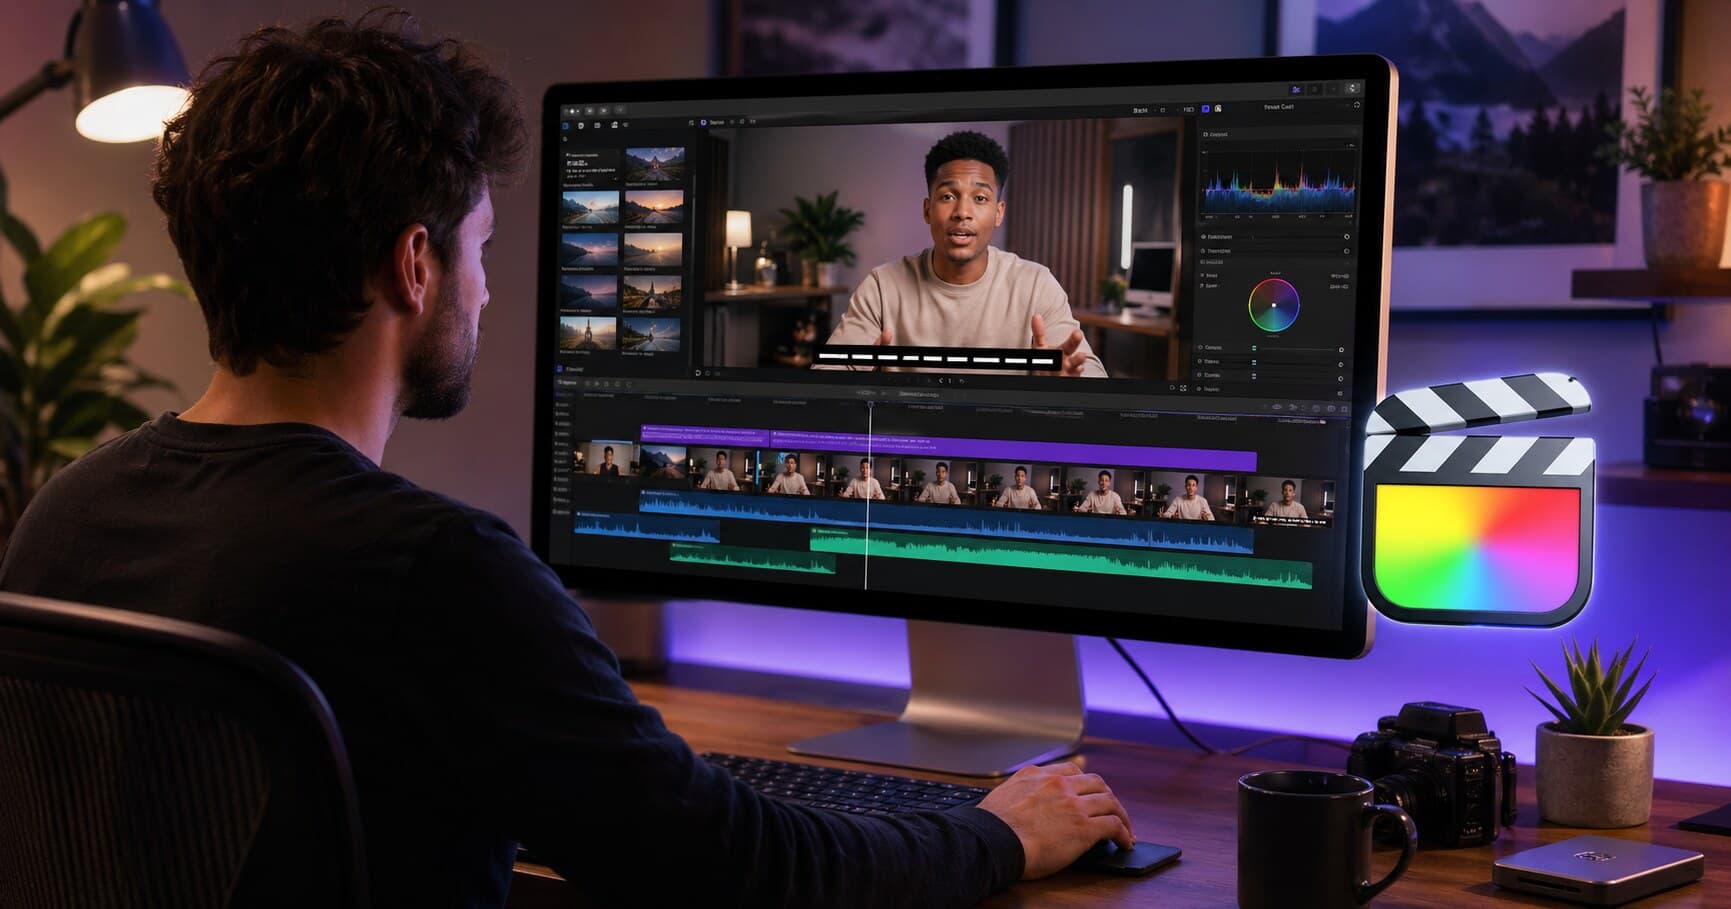
Final Cut Pro හි Transcribe to Captions ලෙස හඳුන්වන නොමිලේ, built-in AI transcription feature එකක් ඇත, එය third-party plugins නොමැතිව ඔබේ video හි audio එකෙන් ස්වයංක්රීයව උපසිරැසි generate කළ හැක. එය භාවිතා කරන ආකාරය, සහ වැඩි accuracy, පරිවර්තනය, හෝ dual-language උපසිරැසි අවශ්ය නම් Subtitle Studio සලකා බැලීමට වටින්නේ ඇයි යනාදිය මෙන්න.
Method 1: Final Cut Pro හි නොමිලේ Built-in Transcription
අවශ්යතා: Apple silicon (M1 හෝ ඉන් පසු) සහිත Mac එකක් සහ macOS Sequoia හෝ ඉන් පසුව. දැනට support කරන්නේ English audio පමණි.
Step 1: Final Cut Pro හි ඔබේ Project එක Open කරන්න
Final Cut Pro launch කර, ඔබ උපසිරැසි එකතු කිරීමට අවශ්ය project එක open කරන්න. ඉදිරියට යාමට පෙර ඔබේ main video clip එක timeline එකේ තිබෙන බවට වග බලා ගන්න.
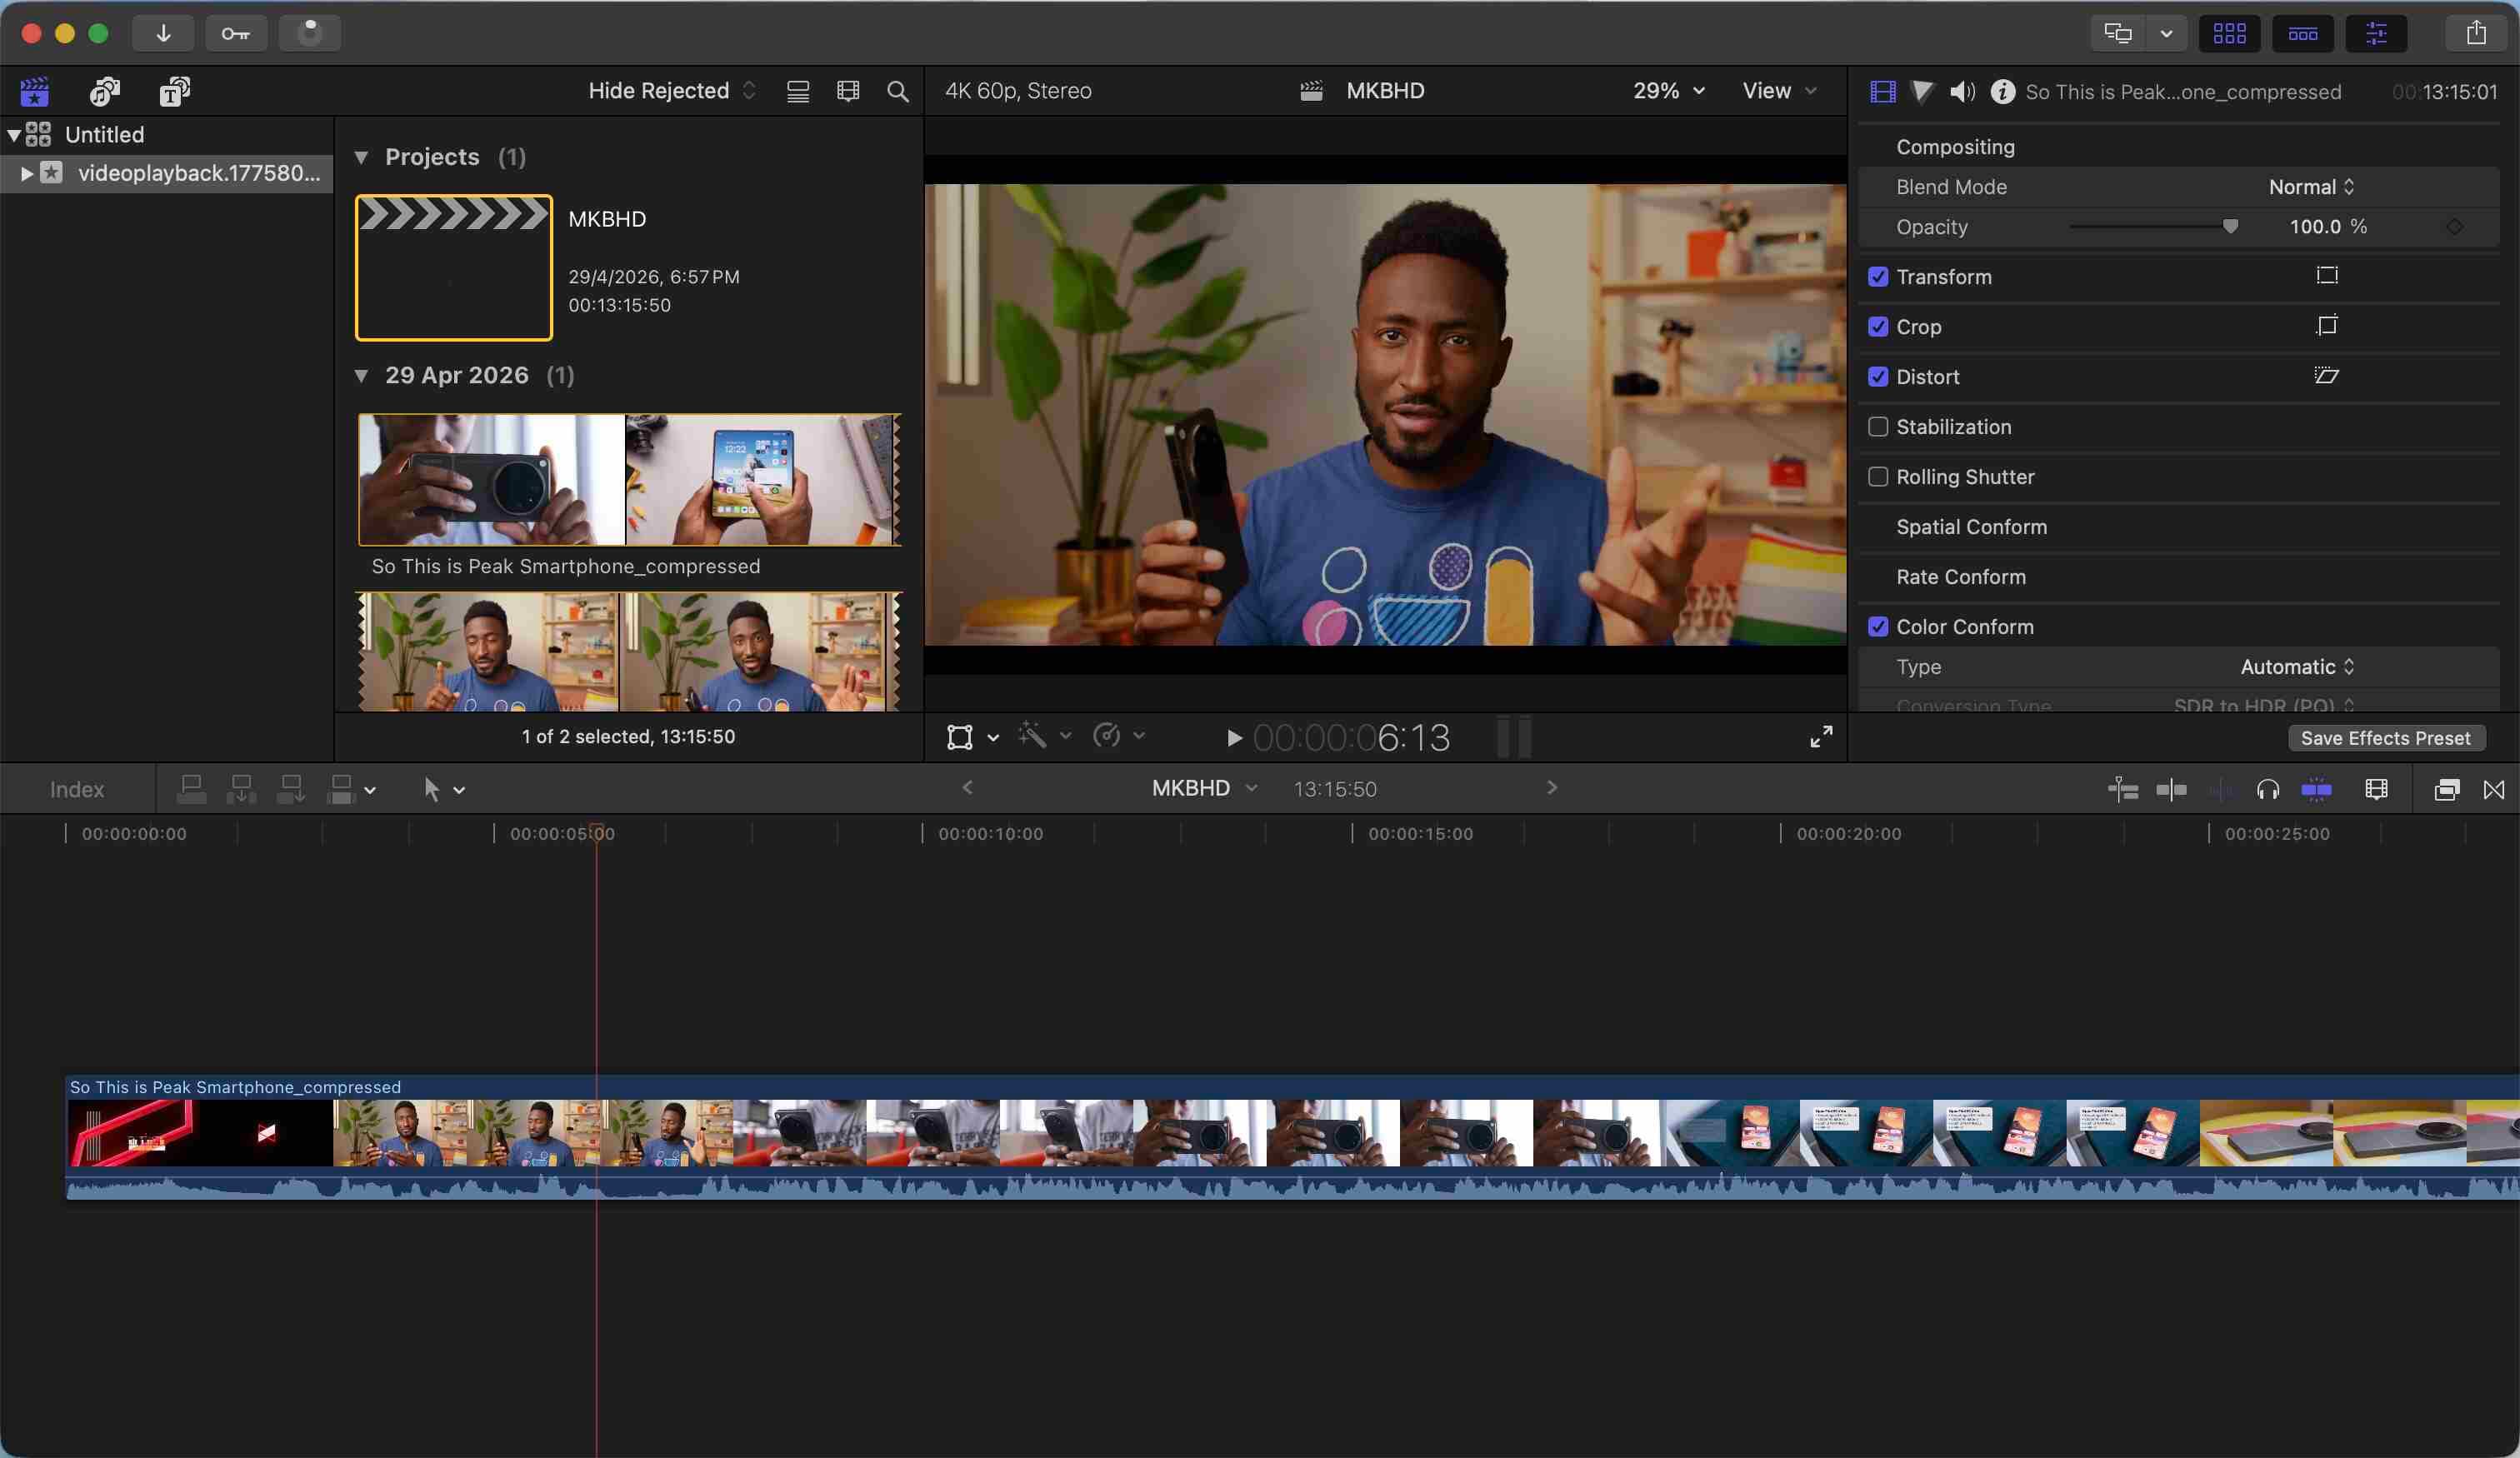 transcribe කිරීමට සූදානම් video project එකක් open කර ඇති Final Cut Pro timeline
Step 2: ඔබේ Clip(s) තෝරා Transcription ආරම්භ කරන්න
Timeline එකේ, කථන audio අඩංගු clip එක හෝ clips click කර select කරන්න. ඔබට clips කීපයක් එකවර select කළ හැක — Final Cut Pro ඒවා සියල්ල අනුපිළිවෙළින් transcribe කරයි. ආරම්භ කිරීමට පහත ඕනෑම එකක් කරන්න:
- select කළ clip(s) මත Right-click කර Transcribe to Captions තෝරන්න
- Edit → Captions → Transcribe to Captions වලට යන්න
- Shift + Command + C press කරන්න
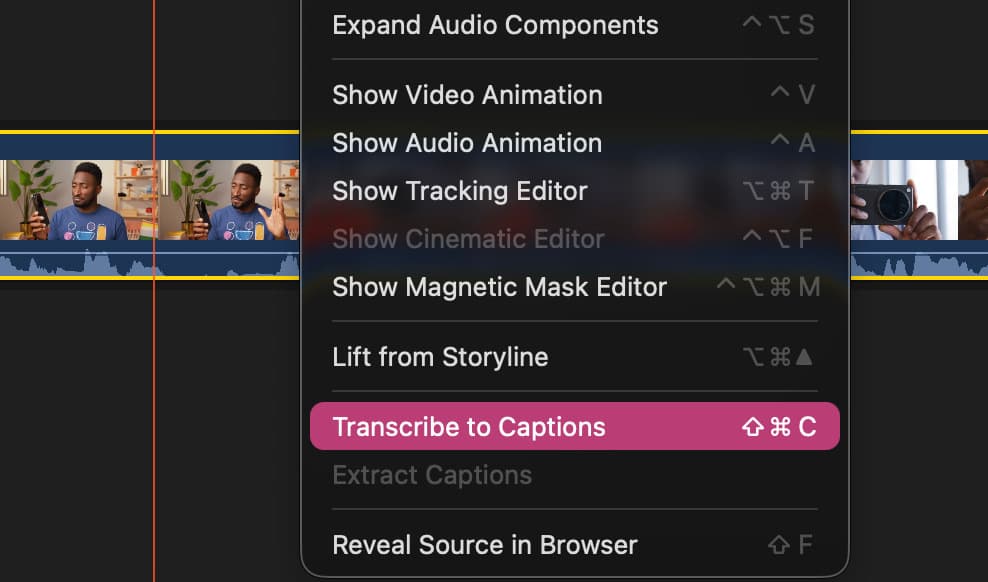 clips select කර ඇති Transcribe to Captions option පෙන්වන Final Cut Pro right-click context menu
පළමු වරද? Transcribe කිරීමට පෙර Final Cut Pro language model එකක් download කරයි. මෙය එක් වර සිදු වන අතර අන්තර්ජාල සම්බන්ධතාවක් අවශ්ය වේ.
Step 3: Transcription සම්පූර්ණ වන තුරු රැඳී සිටින්න
Final Cut Pro සෑම clip එකක්ම process කර, source audio එකට connect වූ caption clips ස්වයංක්රීයව generate කරයි. progress indicator එකක් පෙනී යනු ඇත — transcription සාමාන්යයෙන් clip එකේ actual length එකෙන් කොටසක් පමණක් ගතවේ.
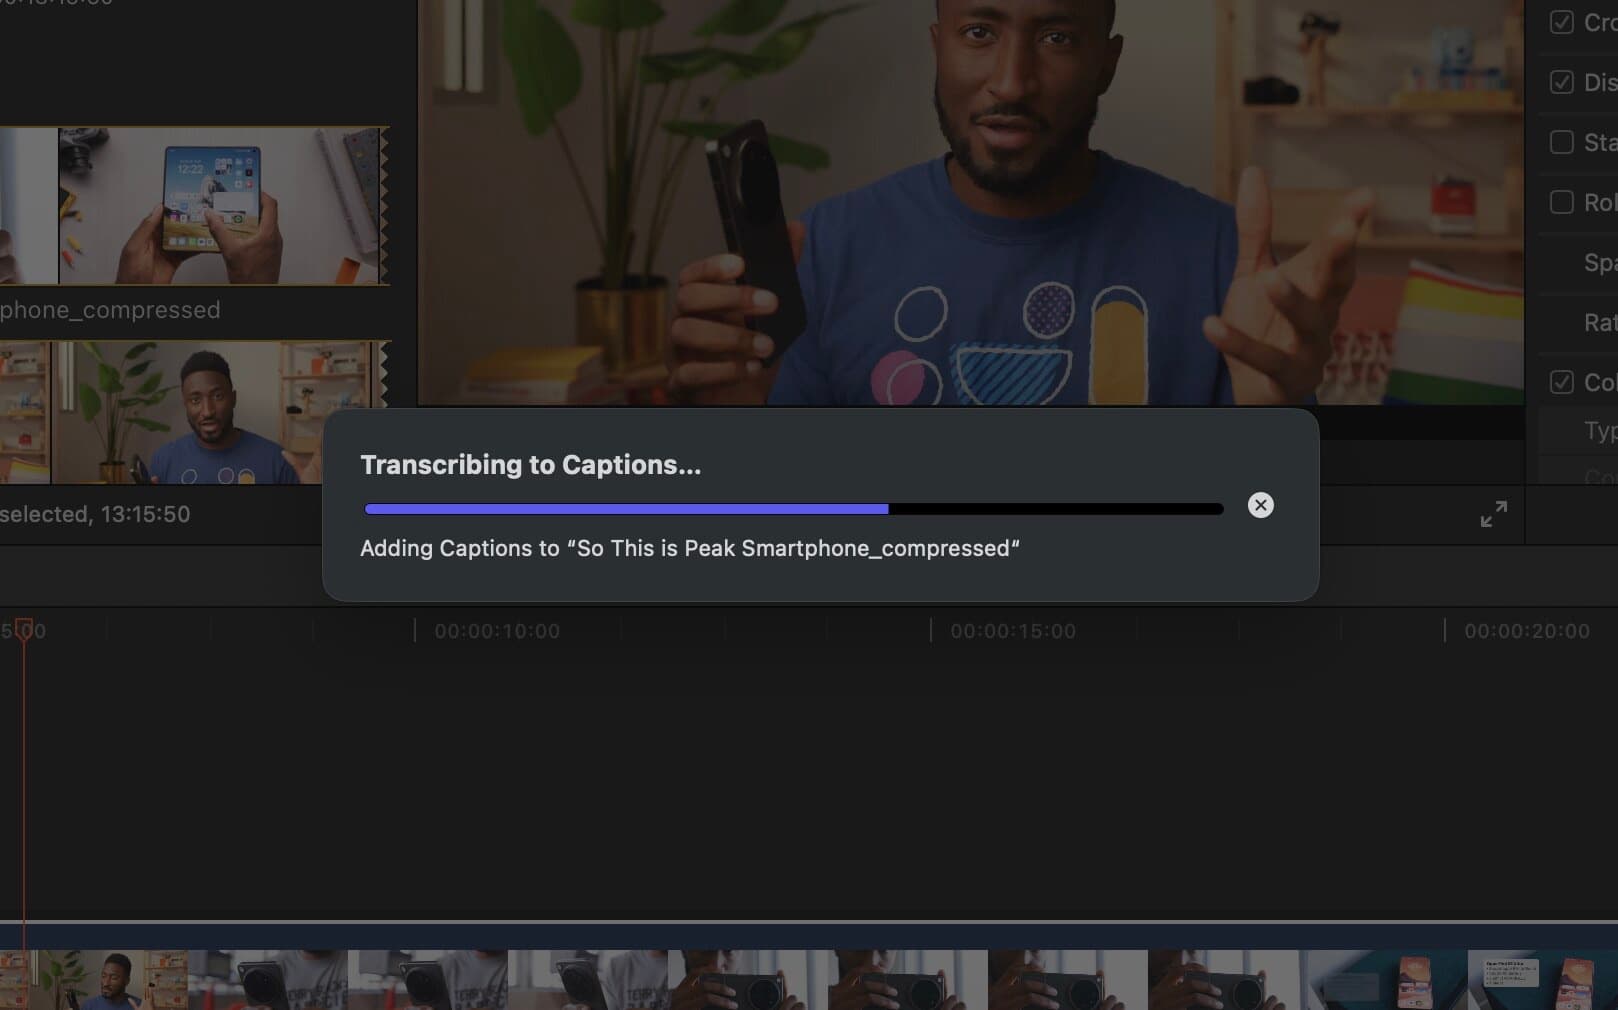 Transcribe to Captions run වන අතරතුර progress bar එකක් පෙන්වන Final Cut Pro
Step 4: Timeline එකේ ඔබේ Captions Review කරන්න
සම්පූර්ණ වූ පසු, ඔබේ primary storyline එකට උඩින් dedicated captions lane එකක් timeline එකේ පෙනී යනු ඇත. සෑම caption clip එකක්ම දැනටමත් කථන audio එකට timed කර ඇත. errors හඳුනාගැනීමට timeline එක හරහා skim කරන්න.
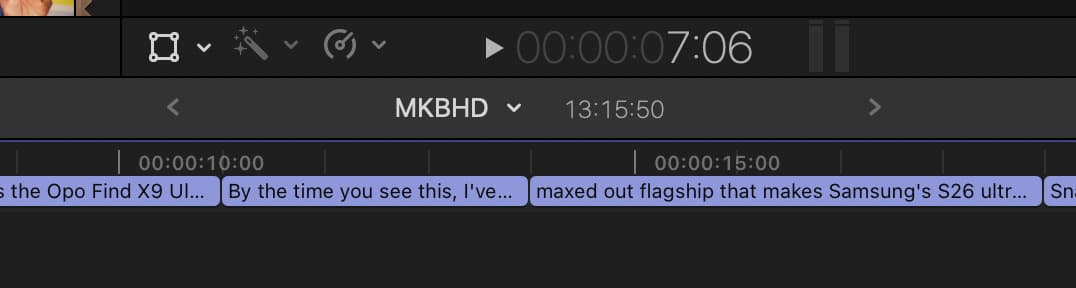 ස්වයංක්රීයව generate කළ caption clips පෙන්වන captions lane එකක් සහිත Final Cut Pro timeline
Step 5: වැරදි ඕනෑම දෙයක් Edit කරන්න
caption editor එක open කර text නිවැරදි කිරීමට timeline එකේ ඕනෑම caption clip එකක් double-click කරන්න. timing fine-tune කිරීමට caption edges drag කළ හැක.
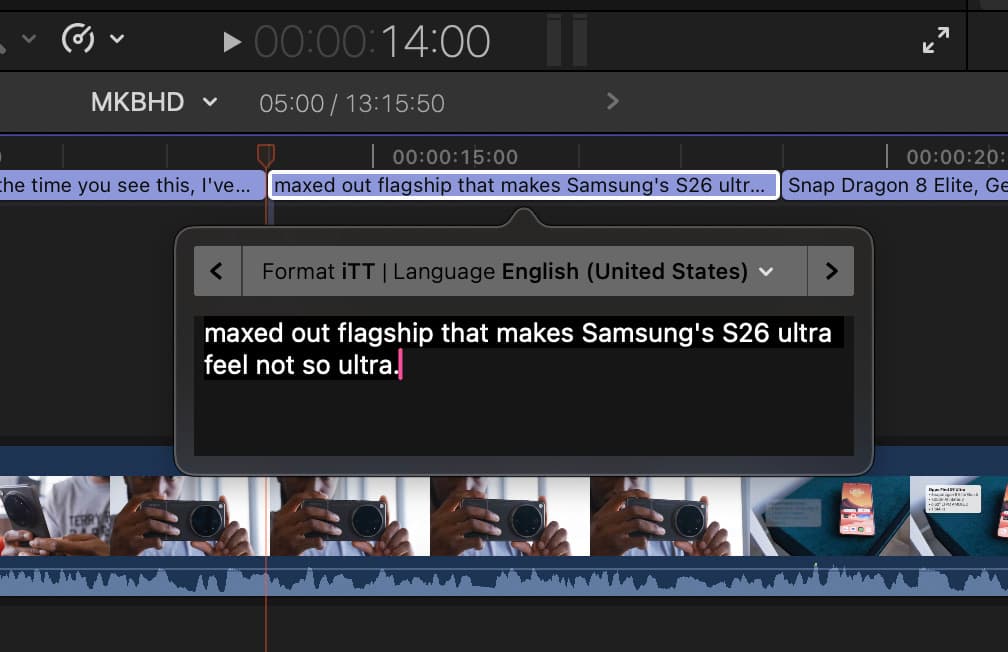 text නිවැරදි කරමින් open කර ඇති Final Cut Pro caption editor
Step 6: ඔබේ Captions Style කරන්න
ඕනෑම caption එකක් click කර, font, size, color, සහ position adjust කිරීමට Inspector → Caption panel එක භාවිතා කරන්න. පුරාවටම consistent style එකක් තබා ගැනීම clean සහ professional ලෙස පෙනී යයි.
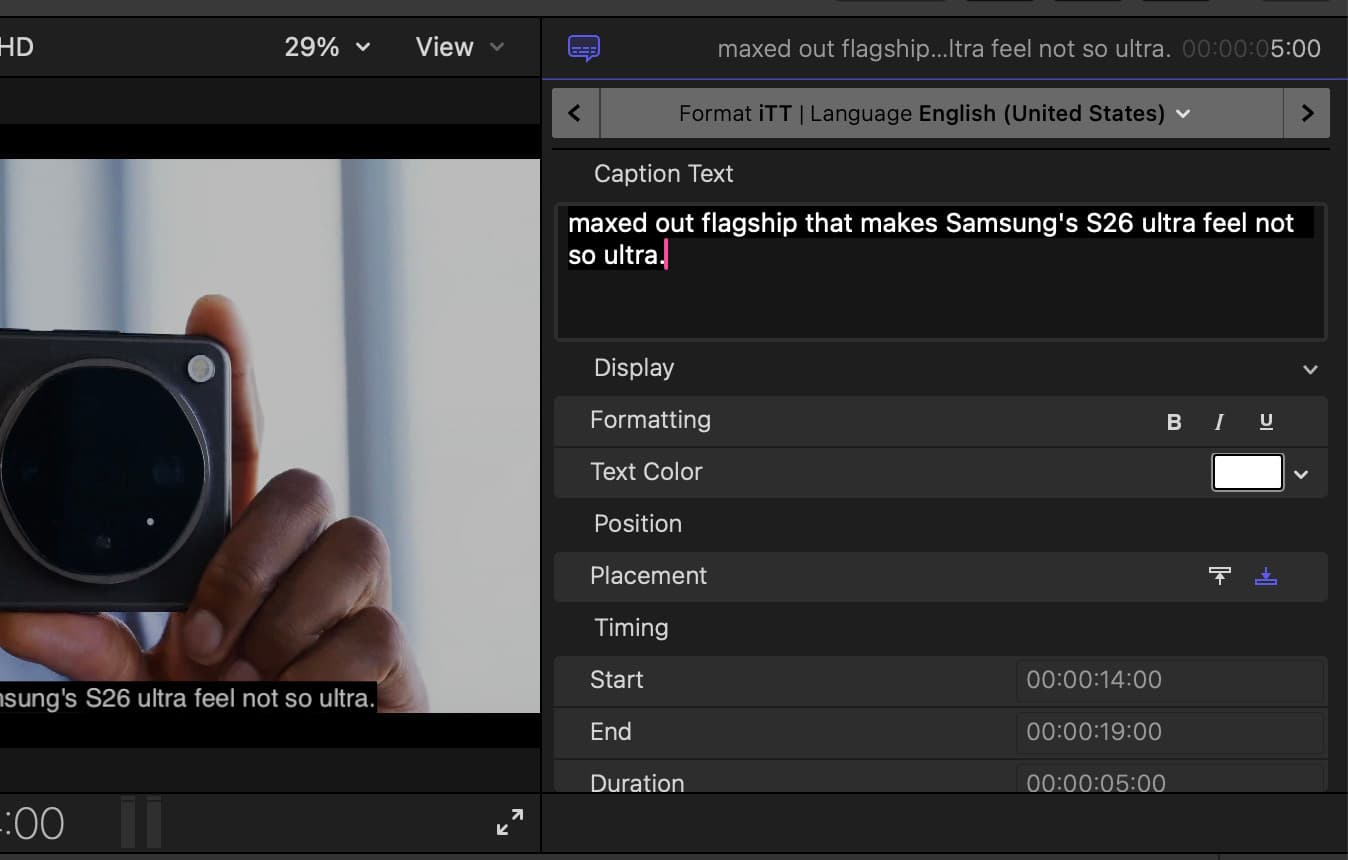 font සහ color styling options highlight කර ඇති Final Cut Pro Caption inspector
Step 7: Captions සමඟ Export කරන්න
File → Share → Master File වලට යන්න (හෝ ඔබ කැමති export preset එක). Roles tab එකේ, ඔබේ captions track එක include කර ඇති බවට වග බලා ගන්න. ඔබට captions video එකට burn කළ හැක හෝ ඒවා වෙනම SRT/iTT file එකක් ලෙස export කළ හැක.
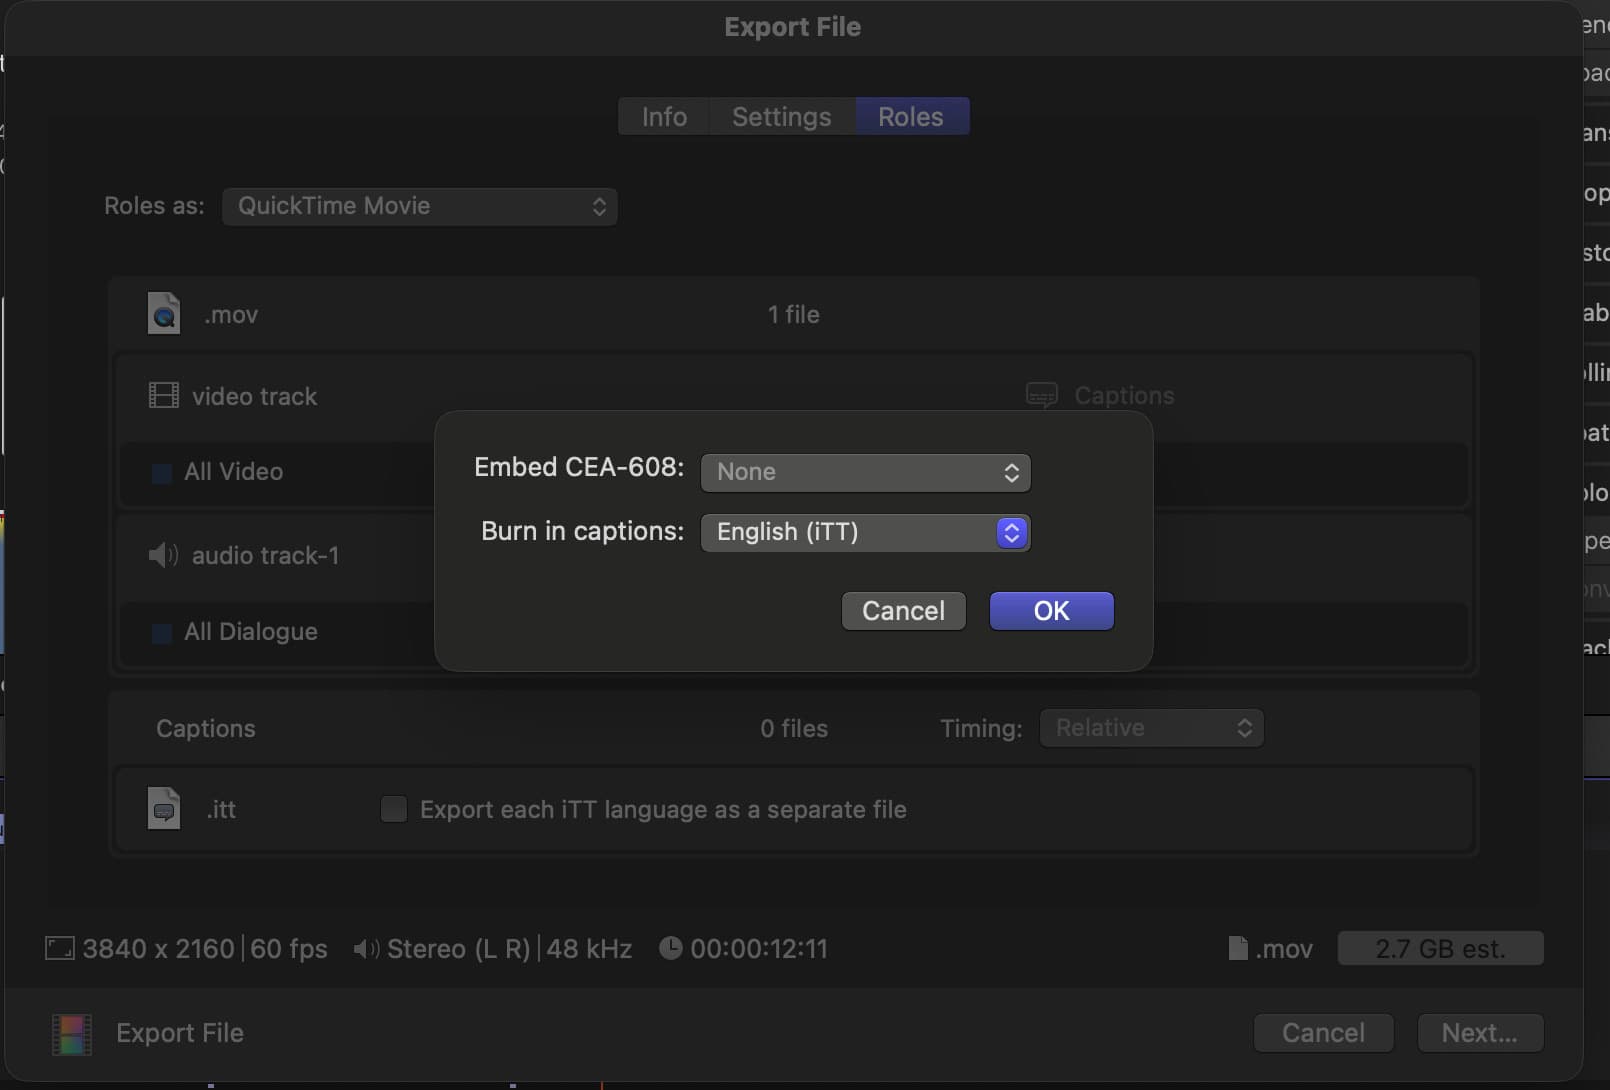 captions track enable කර ඇති Roles panel පෙන්වන Final Cut Pro export dialog
Method 2: Subtitle Studio සමඟ උපසිරැසි Generate කරන්න (වඩා හොඳ Quality, පහසු Editing, පරිවර්තනය)
Final Cut Pro හි built-in transcription එක හොඳ ආරම්භයක් — නමුත් එහි real limitations ඇත. එය support කරන්නේ English පමණි, accents හෝ background noise සමඟ accuracy අඩු විය හැක, timeline එකේ direct dozens caption edit කිරීම tedious ය. Subtitle Studio මේ සියල්ල විසඳයි.
Subtitle Studio වඩා හොඳ ඇයි
වැඩි transcription accuracy — Subtitle Studio Whisper AI භාවිතා කරයි, එය non-standard accents, fast speech, සහ background noise සහිත audio සඳහා විශේෂයෙන් Final Cut Pro හි built-in model එකට වඩා consistently ම හොඳින් performance දක්වයි.
Editing සඳහාම designed — timeline එකේ කුඩා caption clips click කිරීම වෙනුවට, Subtitle Studio ඔබට එක් තැනකදී සෑම line එකක්ම review කර, fix කර, reformat කළ හැකි clean, dedicated උපසිරැසි editor එකක් ලබා දෙයි. purpose-built controls සමඟ split, merge, සහ timing adjust කරන්න.
පරිවර්තනය සහ Dual Subtitles — Final Cut Pro හට කිසි විටෙකත් ලබා දිය නොහැකි feature එක මෙයයි. Subtitle Studio ට ඔබේ උපසිරැසි වෙනත් භාෂාවකට පරිවර්තනය කර dual-language උපසිරැසි නිර්මාණය කළ හැක — original සහ පරිවර්තනය දෙකම එකවර පෙන්වයි. international audiences ඉලක්ක කරන content සඳහා පරිපූර්ණයි.
සියලුම භාෂා support කරයි — Final Cut Pro හි transcription එක English-only ය. Subtitle Studio භාෂා දුසිම් ගණනාවක් හරහා transcribe කර translate කරයි.
Step 1: Subtitle Studio හි උපසිරැසි Generate කරන්න
ඔබේ video Subtitle Studio වලට import කර Generate Subtitles click කරන්න. On-device Whisper AI accurate, time-coded උපසිරැසි file එකක් produce කරයි — cloud upload එකක් අවශ්ය නොවේ.
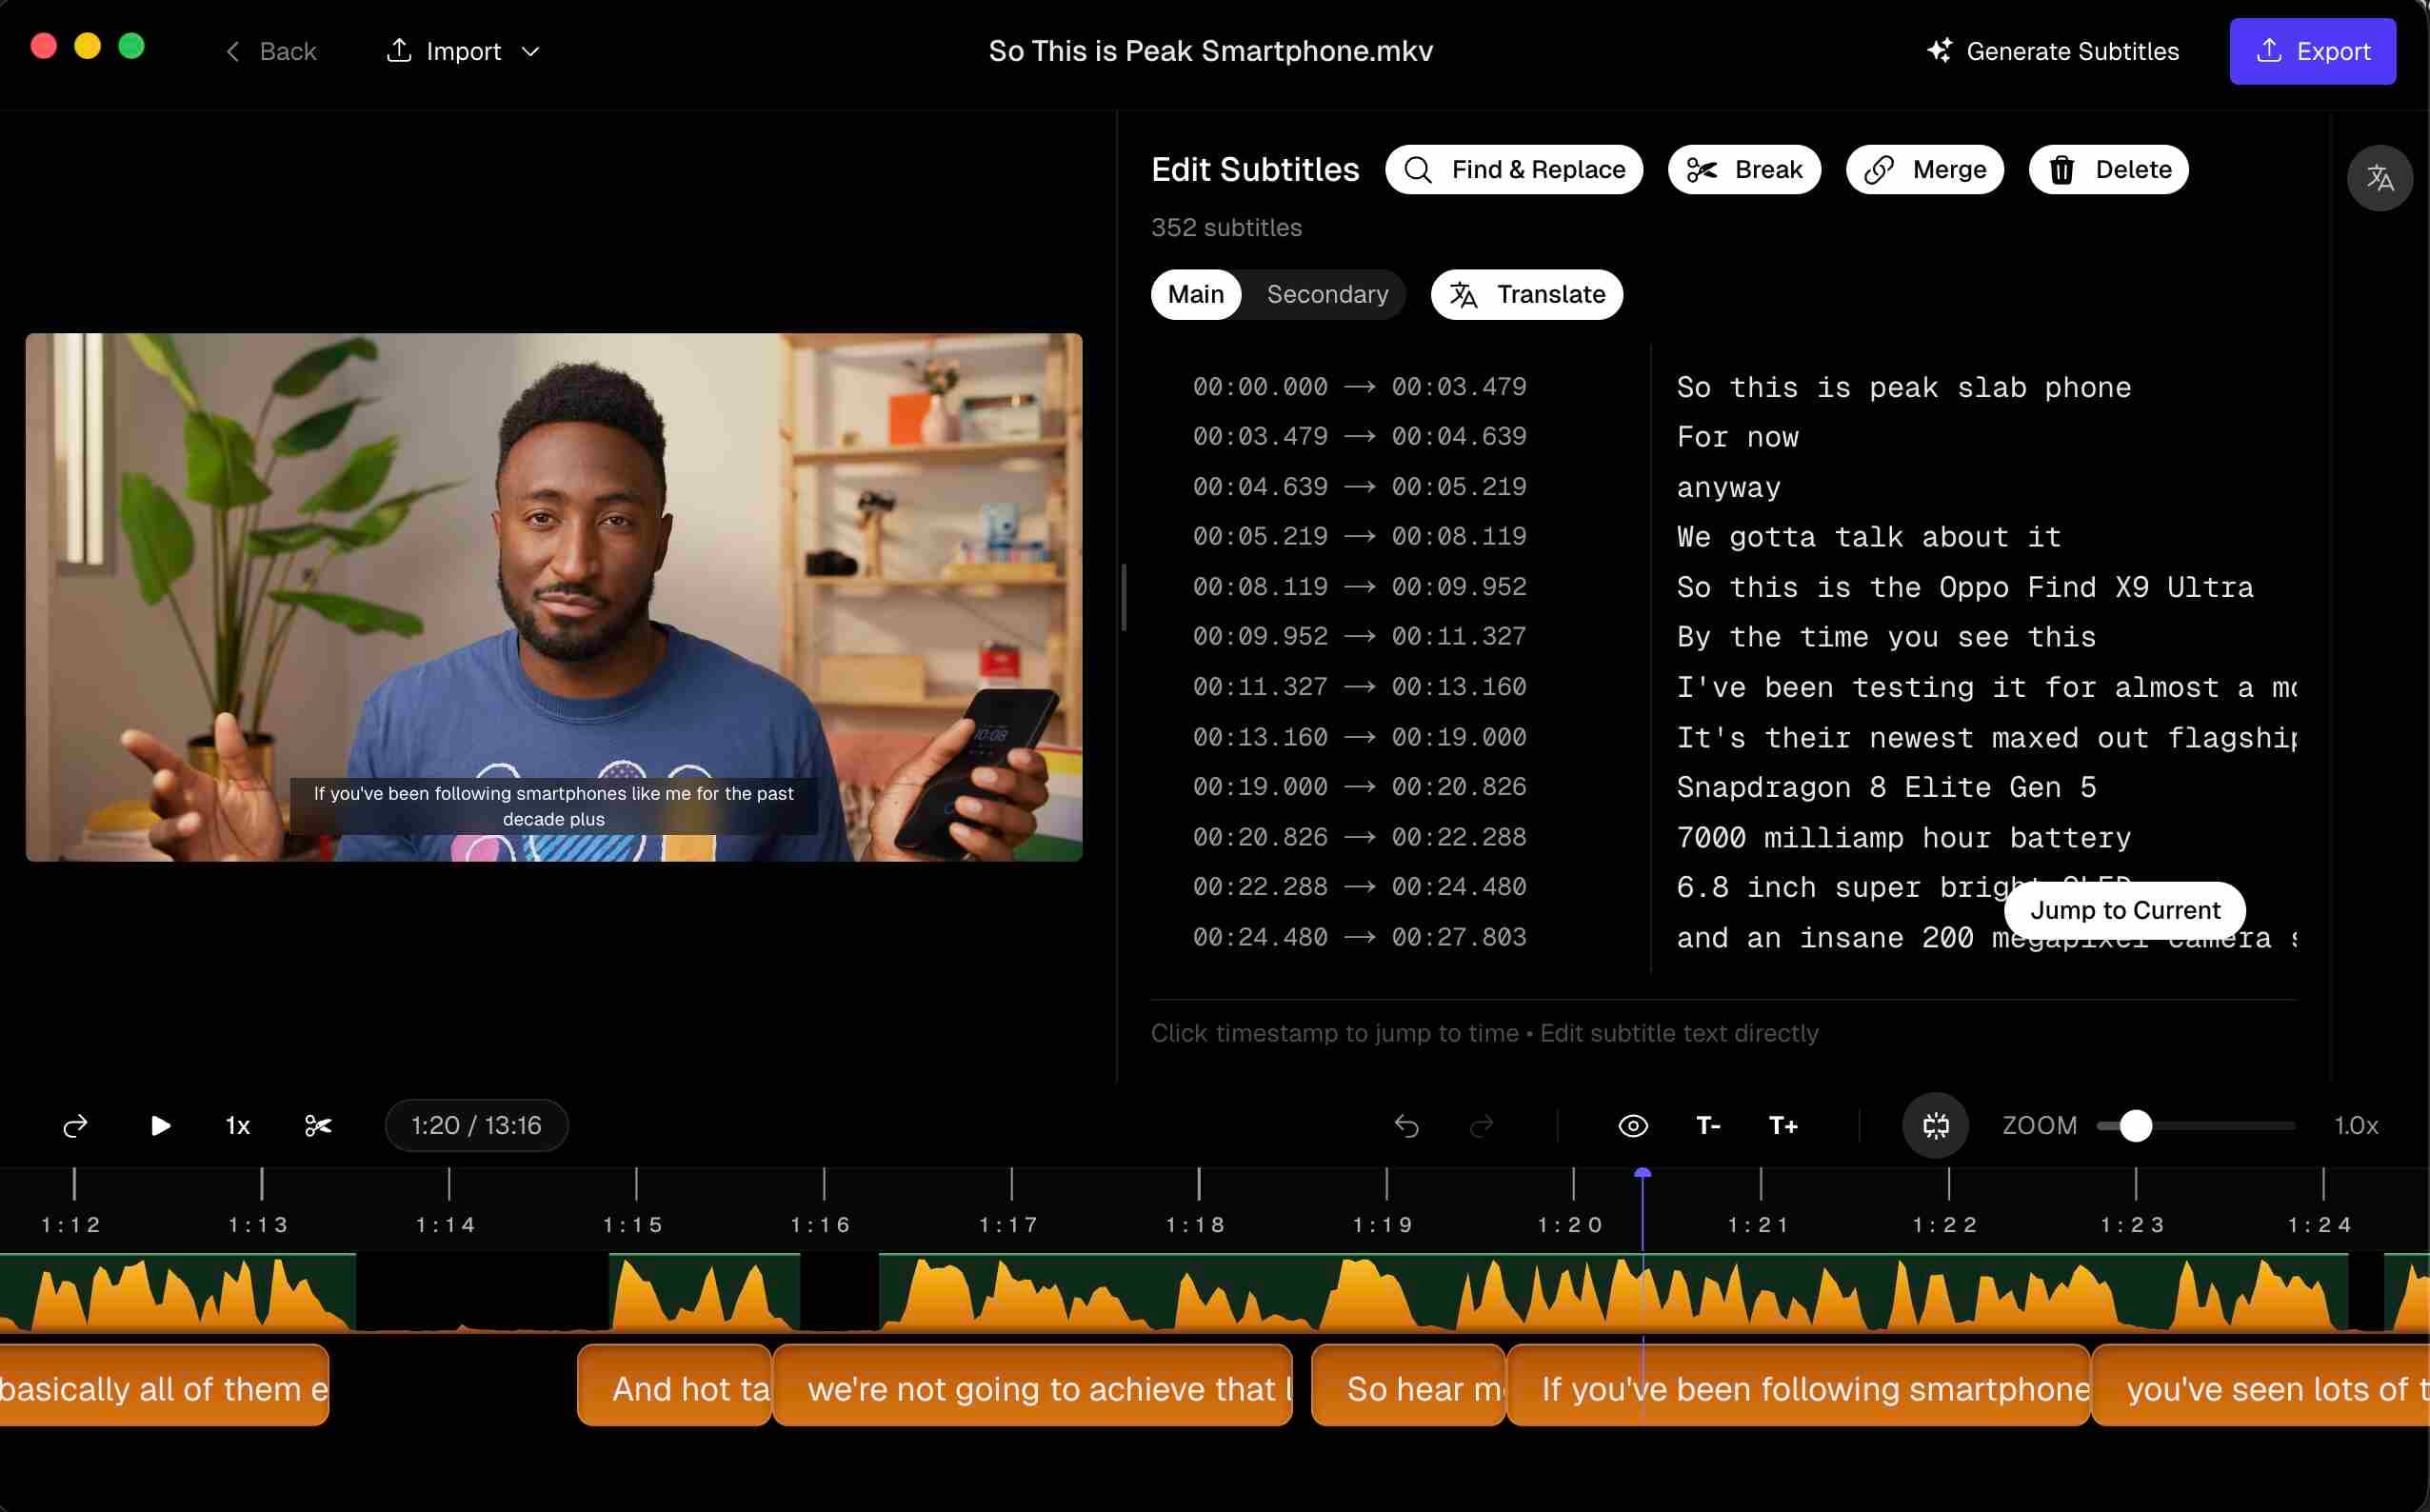 review කිරීමට සූදානම් උපසිරැසි සමඟ සම්පූර්ණ වූ උපසිරැසි generation එකක් පෙන්වන Subtitle Studio
Step 2: Dedicated Subtitle Editor එකේ Edit කරන්න
Subtitle Studio හි editor එකේ සෑම උපසිරැසි line එකක්ම review කරන්න. Final Cut Pro timeline එකට touch නොකර errors fix කරන්න, timing adjust කරන්න, දිග lines split කරන්න, formatting clean කරන්න.
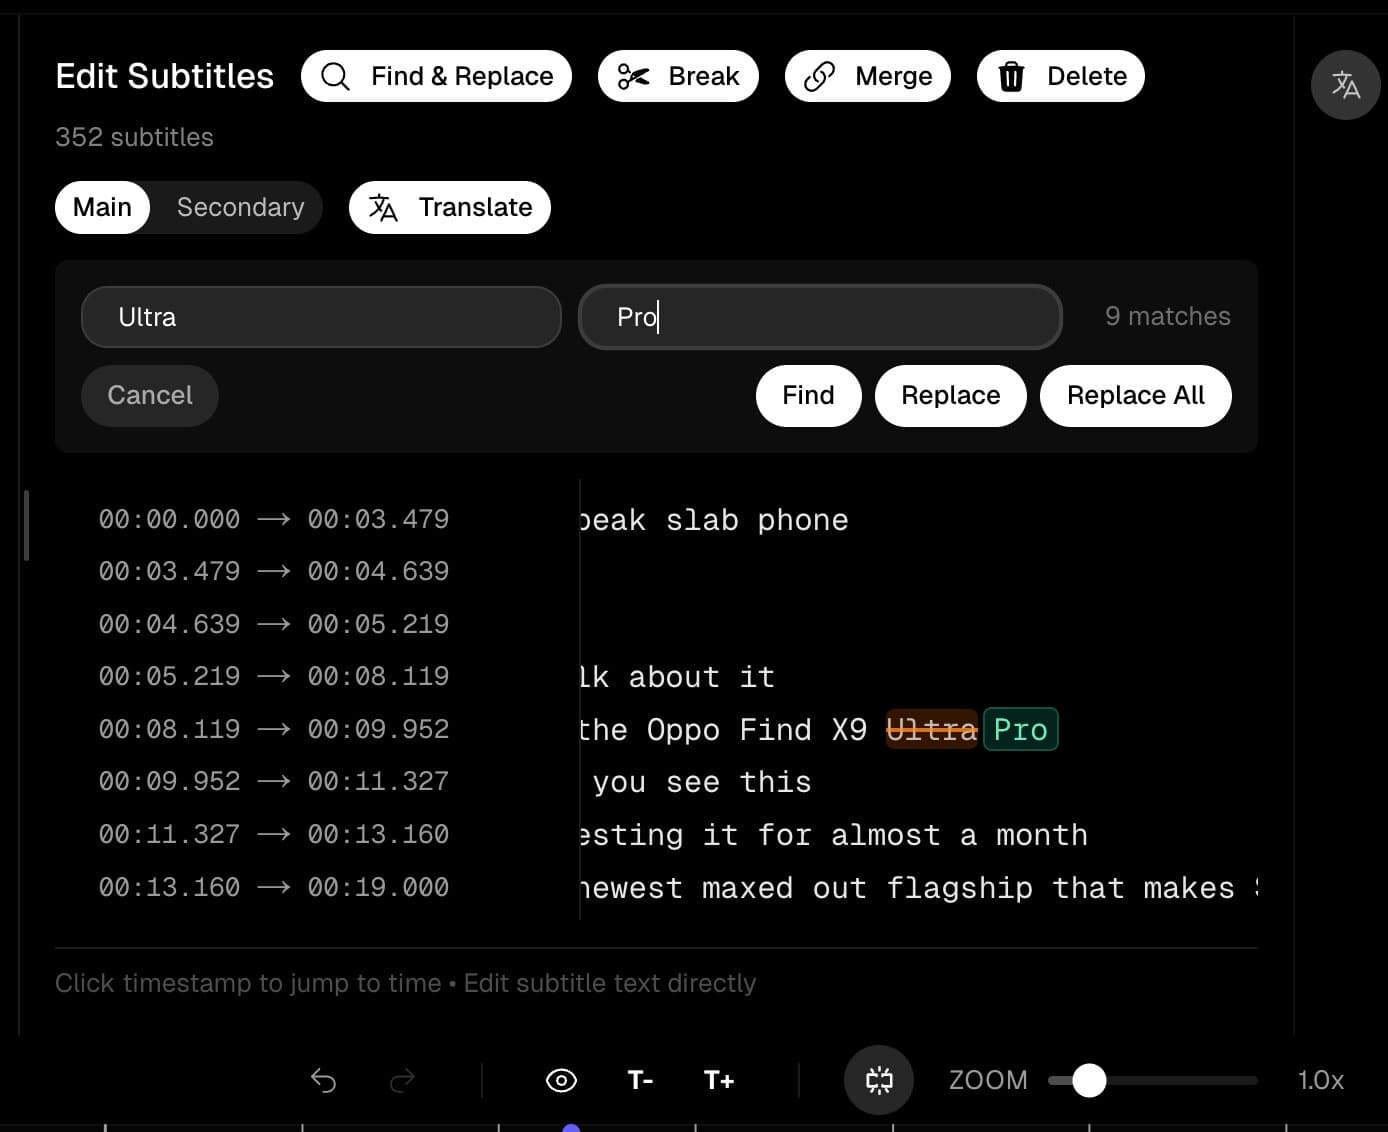 editing controls සමඟ individual උපසිරැසි lines පෙන්වන Subtitle Studio editor
Step 3: පරිවර්තනය කර Dual Subtitles Enable කරන්න (Optional)
ඔබේ උපසිරැසි වල පරිවර්තිත version එකක් generate කිරීමට Subtitle Studio හි translation feature එක භාවිතා කරන්න. bilingual audiences හෝ language learners සඳහා ideal ලෙස, dual-language උපසිරැසි ලෙස භාෂා දෙකම එකවර display කිරීමට තෝරාගත හැක.
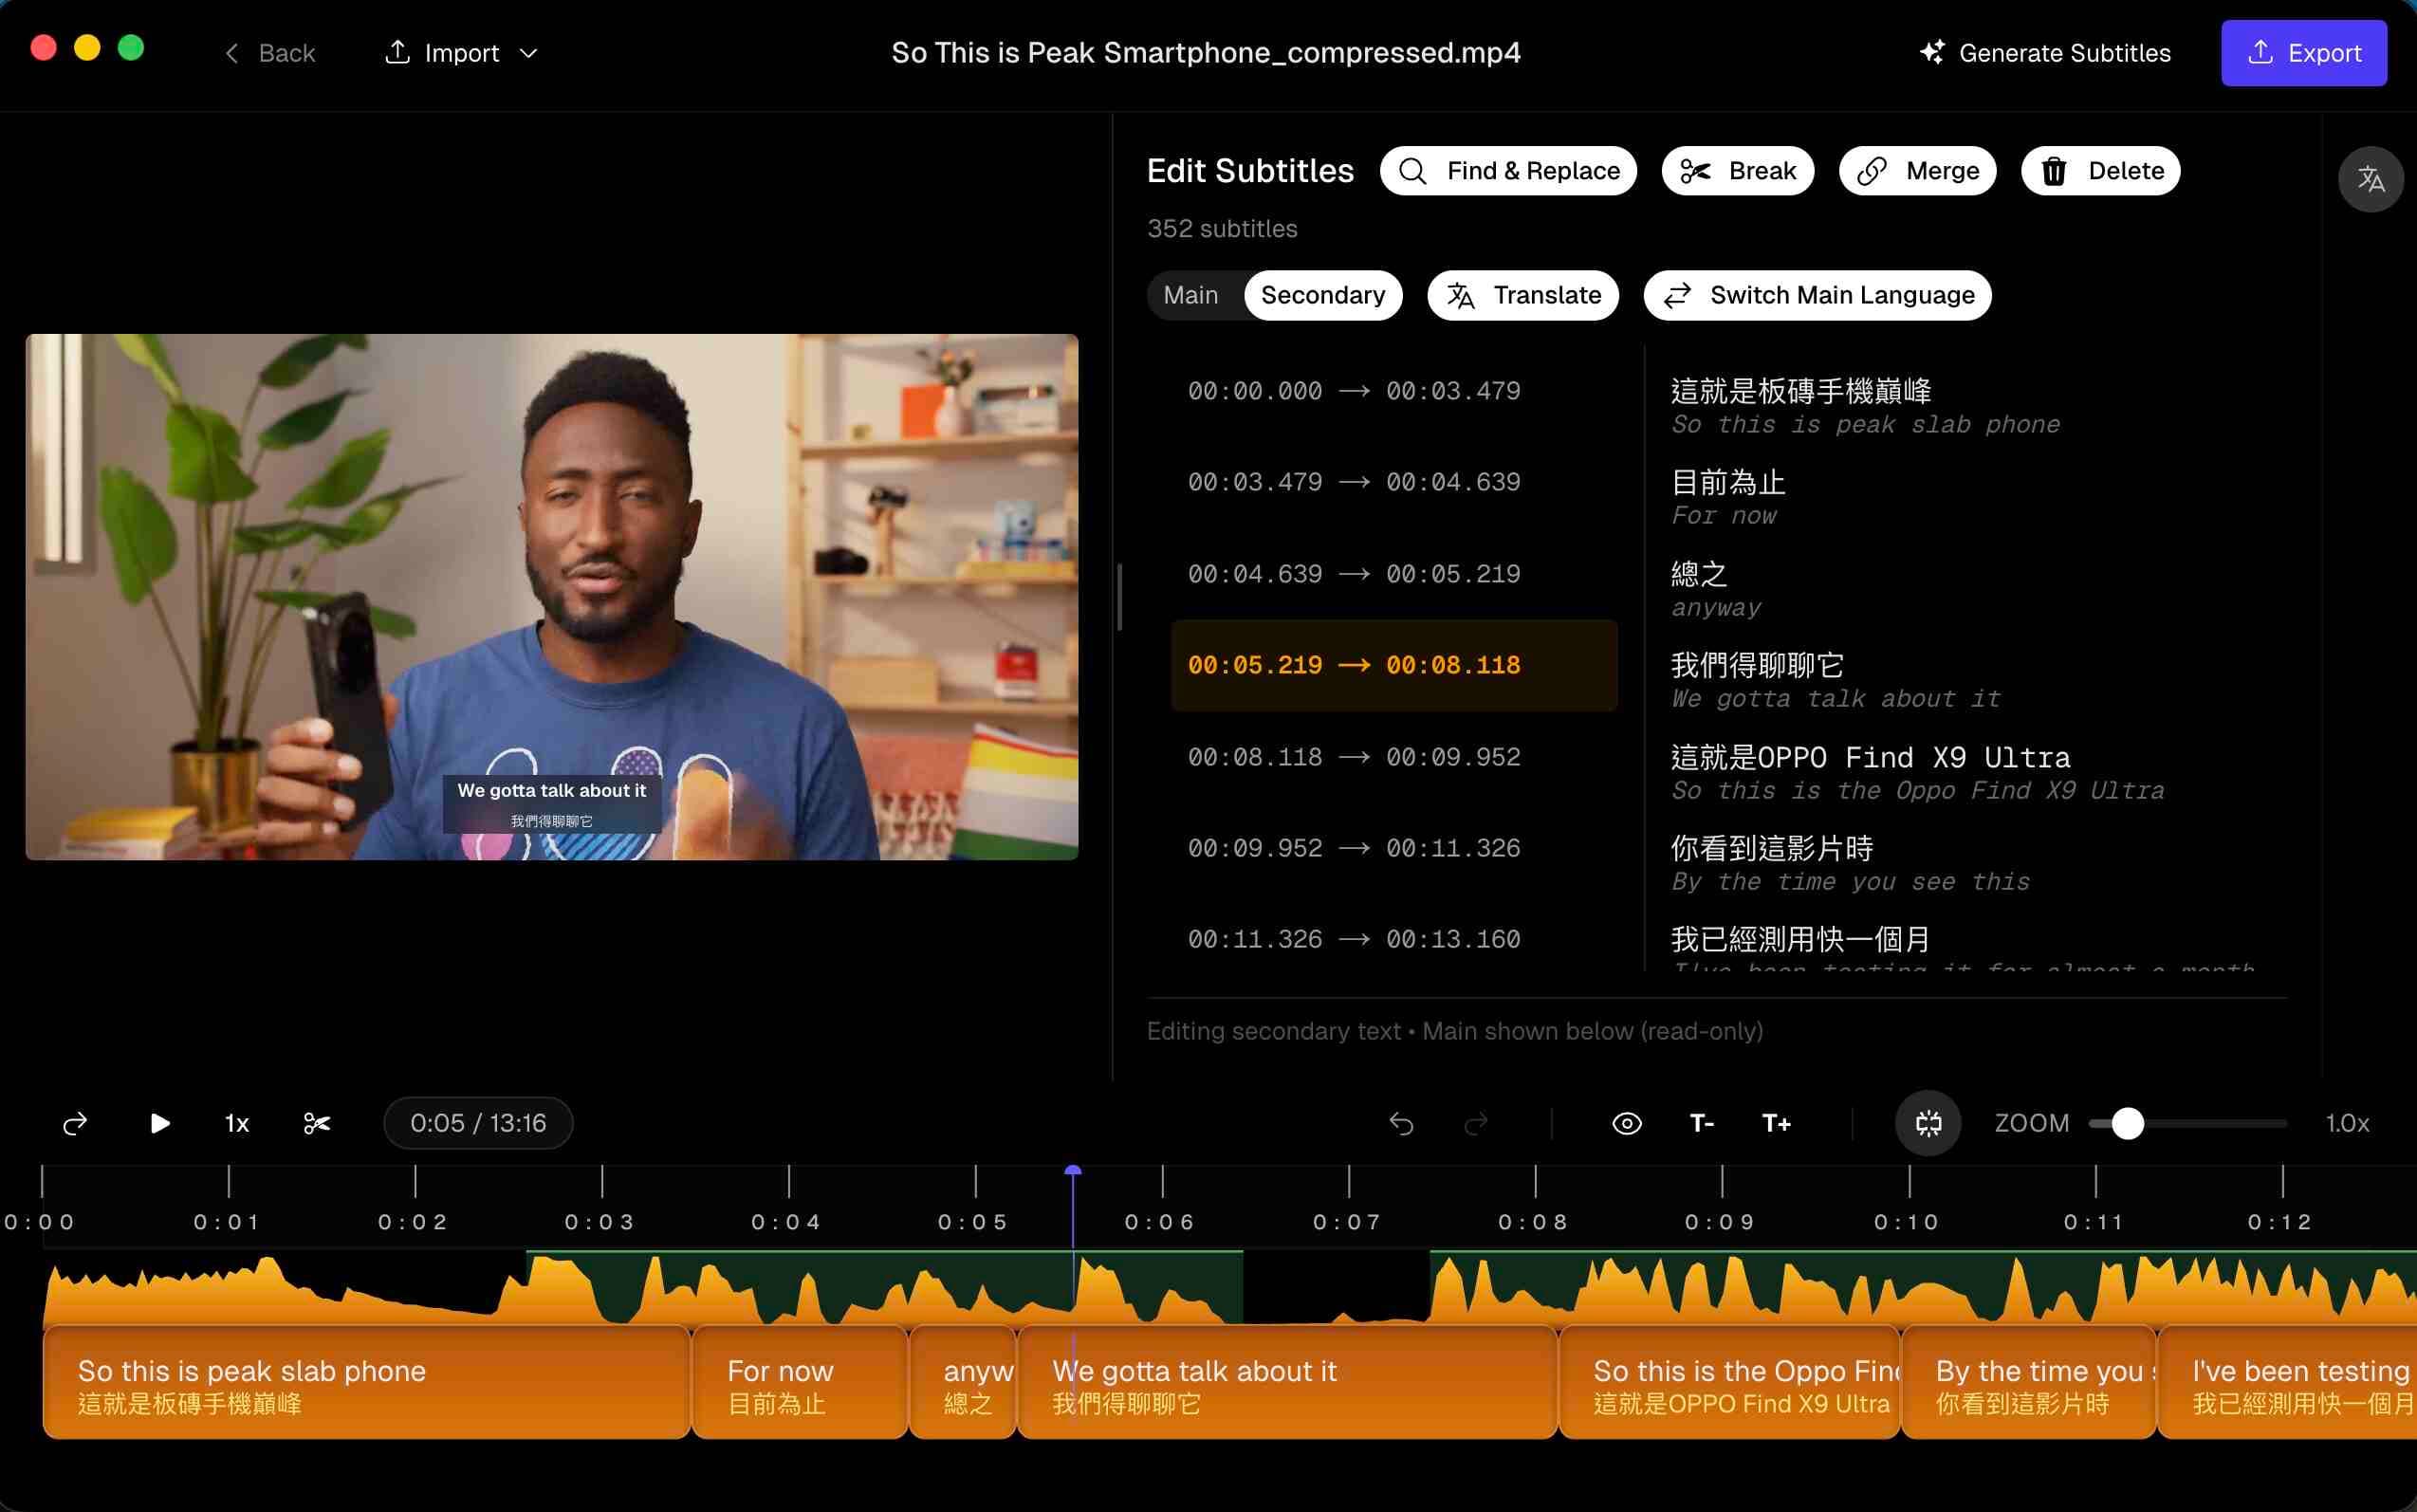 original සහ translated text සමඟ dual-language උපසිරැසි output එකක් පෙන්වන Subtitle Studio
Step 4: Export කර Final Cut Pro වලට Import කරන්න
Subtitle Studio වලින් SRT file එක export කරන්න. Final Cut Pro හි, Edit → Captions → Import Captions වලට ගොස් ඔබේ file එක select කරන්න. Final Cut Pro නිවැරදි timing සමඟ සියලුම captions timeline එකට ස්වයංක්රීයව placeකරයි.
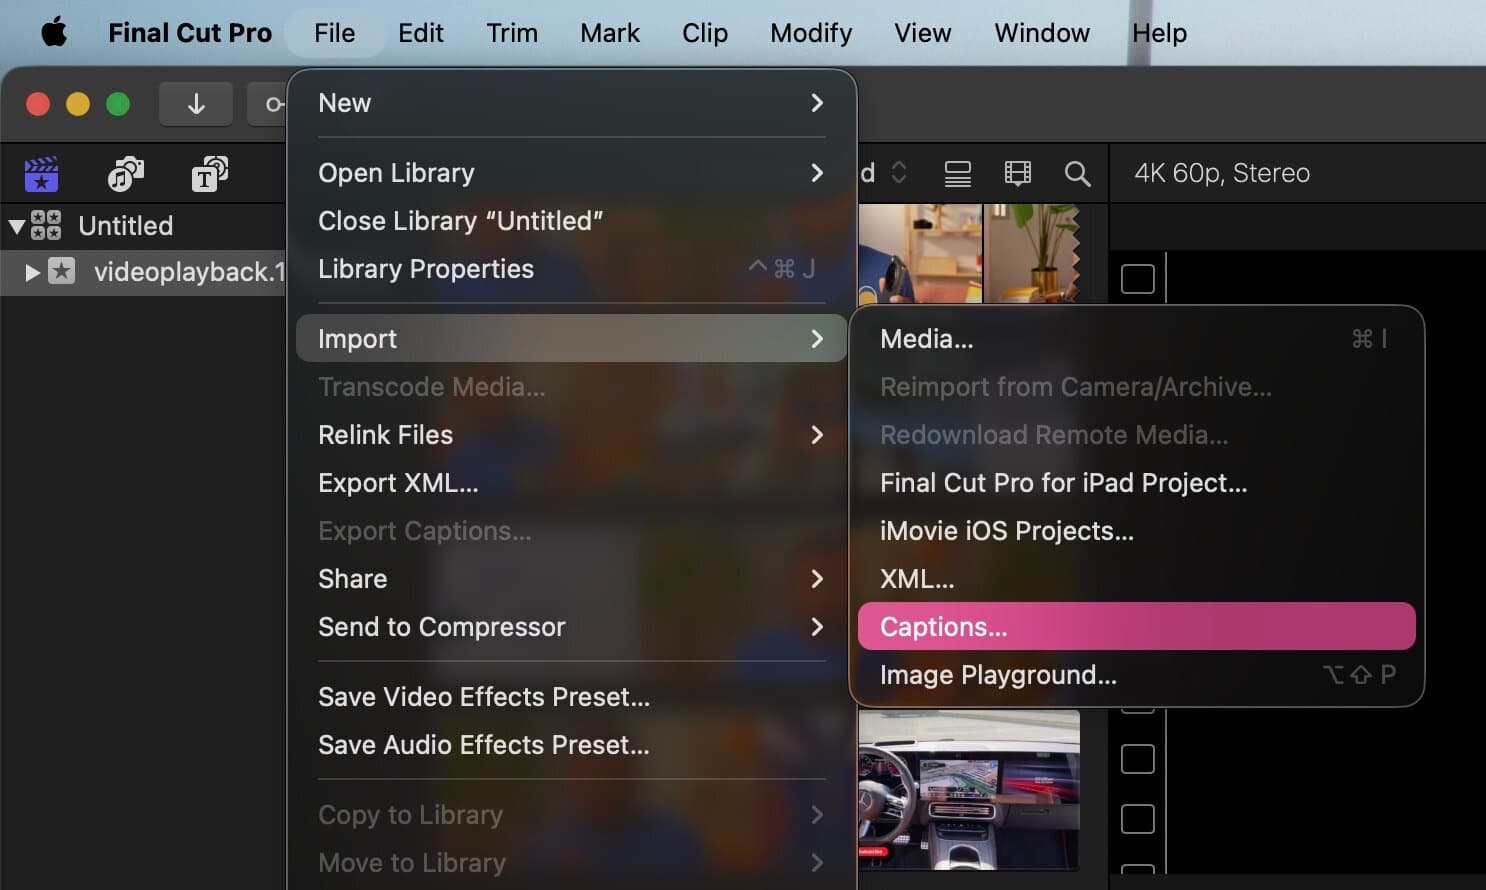 SRT file එකක් select කර ඇති Final Cut Pro Import Captions dialog
Final Cut Pro හි Professional-Looking Captions සඳහා Tips
- උපරිම lines දෙකක් — readability සඳහා captions text lines දෙකකට සීමා කරන්න
- Safe zone awareness — TV displays වල cut-off වීම වළක්වා ගැනීමට text title-safe area තුළ තබන්න
- Consistent timing — තප්පරයකට වඩා අඩු captions කියවීමට අපහසුයි; අඩුම වශයෙන් තප්පර 1.5ක් ඉලක්ක කරන්න
- Export වලදී proofread කරන්න — delivery කිරීමට පෙර captions visible ව ඇති final export එක සෑම විටම බලා යන්න
නිගමනය
Apple silicon Macs හි English content සඳහා Final Cut Pro හි නොමිලේ Transcribe to Captions feature එක ඇත්තටම ප්රයෝජනවත්ය — එය fast, free, සහ ඔබේ timeline එකට direct integrate වේ. English නොවන content, noisy audio, පරිවර්තන අවශ්යතා, හෝ පහසු editing experience එකක් වැනි වඩාත් demanding ඕනෑම දෙයක් සඳහා, Subtitle Studio meaningfully වඩා හොඳ ප්රතිඵල සහ chore එකක් වැනි නොදැනෙන workflow එකක් ලබා දෙයි.
Subtitle Studio නොමිලේ උත්සාහ කරන්න
එක් වර ගෙවීමකි, දායකත්වයක් නැත. ඔබේ Mac එකේම සම්පූර්ණයෙන් ඕෆ්ලයින්ව ක්රියා කරයි.
